candor user manual

welcome to the candor realtime music system
this linux software enables a monome 256 user to capture and playback audio from up to 8 channels simultaneously, managing a maximum of 48 remembered wav soundfiles without a computer display. it is a client of the Jack Audio Connection Kit (http://jackaudio.org, http://www.monome.org/).
please file questions, concerns, and bugs on github or send directly to me at mrafoster@gmail.com.
table of contents
- required dependencies
- building and installation
- runtime options
- interface overview
- getting started
- candor sampler
- overview
- assigning channels for capture/playback
- capturing and storing a new sound
- playing a stored sound
- looping a sound
- capturing sound for a limited duration (or, how to keep your audio loops in phase)
- stopping a currently playing sound
- monitoring channel inputs
- applying simple effects to a sound
- candor sequencer
- overview
- pausing and resuming the sequencer
- sequencer as a master clock or slave
- setting the sequencer to follow tap-tempo
- adjusting the sequencer's tempo
- assigning a sound to a step's voice
- toggling a step's voice to trigger
- open sound control
1. required dependencies
- linux, maybe mac os x
- libsndfile - C library for reading/writing audio files (http://www.mega-nerd.com/libsndfile/)
- alsa and alsa development libraries - (http://alsa-project.org/)
- JACK server installed and running with development libraries - (http://jackaudio.org)
- liblo - lightweight OSC implementation (http://liblo.sourceforge.net)
- libmonome - C library for interfacing with monome (https://github.com/monome/libmonome)
2. building and installation
-
Download candor from github and extract zip archive.
$ wget https://github.com/resinbeard/candor/archive/master.zip
$ unzip master.zip
-
Descend into extracted directory and build candor.
$ cd candor-master
$ make
Installing candor is optional. You can run it from anywhere on your system, installing just makes it more convenient to launch. If you do install, keep in mind you must run candor with a non-default directory by appending the "-pa" option.# make install
-
Tidy up. Either remove sources (candor-master) or move them somewhere for later.
$ cd ..
$ rm master.zip
$ mv candor-master ~/src/.
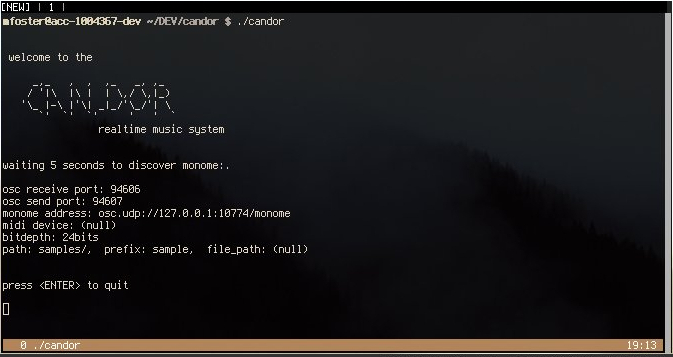
3. runtime options
$ ./candor -h
welcome to the candor realtime music system

Usage: candor [options] [arg]

Options:
 -h,  --help          displays this menu
 -p,  --port          set osc interface receiving port. default: 94606
 -sp, --send-port     set osc interface sending port. default: 946407
 -n,  --name          monome device name to connect to. no default
 -m,  --monome        disables serialosc, enables manual monome port configuration. no default
 -mi, --midi          enables alsa midi device, ex: 'hw:VSL'
 -b,  --bitdepth      set bitdepth of capture to 8,16,24,32,64, or 128. default: 24
 -pa, --path          set directory of where to store captured sounds. default: 'samples/'
 -pr, --prefix        set prefix name for all captured sounds. default: 'sample'
 -f,  --file          set path of session file to load preexisting sounds.

see http://resinbeard.github.io/candor/ for documentation
4. interface overview
A user may interact with candor using two methods: open sound control's network protocol or a monome.
-
open sound control
candor itself provides an open sound control (http://opensoundcontrol.org) interface to ficus and candor available at port 94606. By passing the runtime option "-p" or "--port" at startup, this default port may be overridden. Specifics of this interface are further detailed in the open sound control section.
-
monome
In order to access a monome, candor will by default use serialoscd's default port 12002 and focus on the first monome it finds. In order to manually assign a monome with a known address (like if you use multiple monome grids), pass the runtime option "-m" or "--monome" with the monome's serialosc port number at startup.
The monome's quadrants I and II provide main sampler/sequencer functionality while III and IV are used to assign sounds to each step of the sequencer. Functional aspects of this interface are described in the sampler and sequencer sections.
sampler,sequencer, and step assignment.
-
midi
Midi in candor is extremely limited. It uses raw alsa and only allows triggering of capturing armed sample and starting/stopping the sequencer. When starting candor, specify the "-mi" or "--midi" option and the alsa name of your midi interface such as "hw:VSL". Triggering samples thru midi allows one to trigger capture of multiple samples, one at a time, in the order they are armed on the monome interface. To trigger capturing of armed samples, send message from your midi device to channel #1 note #0. To start/stop the sequencer, send message thru your midi device channel #1 note #1.
5. getting started
-
Start serialosc and plug in your monome.
$ serialoscd
serialosc [m256-114]: connected, server running on port 10774
-
Start jackd and then candor or start candor and jackd will be started automatically with your saved jackd settings.
$ qjackctl &
$ ./candor
-
By default, candor will start up a temporary osc server on port 94606 and ask serialoscd for a list of devices. The port belonging to the first monome that is found will be selected for communication. After recording that port number, the original osc server exits and a new, permanent osc server is constructed again on port 94606. The new server is used as candor's osc's interface.
6. candor sampler
-
overview
The sampler is candor's audio component. It is responsible for storing, recalling, capturing, playing back, and mixing 48 remembered sounds. For each of the sampler's features there is a monome-illustrated description.
The monome sampler interface is divided up into two main parts: the control row and the remembered sounds. between these elements lies a row which switches channel monitoring (we won't worry about this for now).
remembered sounds,control row, monitors select
The control row represents a group of actions. The remembered sounds represent a group of items to act upon.
For example, pressing one of the remembered sounds will perform the action selected in the control row upon that pressed sound. There exist 8 different actions available from the control row, enumerated from left to right:
- playback
- loop
- playback modifier
- capture
- capture duration
- input channel mixing
- output channel mixing
- stop all playback
The interactions are grouped by task, so hopefully it'll be a little easier to get started. Some of the functions of the control row have dual roles, so please read the following sections carefully. -
assigning channels for capture/playback
candor offers 8 capture and 8 playback channels. By way of the open sound control interface, each remembered sound may be captured/played from/thru any or all of the 8 channels at once. The monome interface offers 6 rows of 8 sounds, each row may capture/play from/thru any or all of the 8 channels at once.
The capture/playback channel assignment is one of the sampler's monome functions whose top-48 pads do not correspond to the remembered sounds. When you're in either of these modes, each row represents the enabled/disabled channels for that row of sounds, each row of pads representing channel capture/playback 0-7, left to right.
If we wanted to playback all sounds of the top row thru channel 1, we would:
- Select control row button 6 (playback mixing)
- Select the second button on the top row, enabling channel 1 output for sounds on that row
If we also wanted to playback all sounds of the second from top row on channels 0, 3, 5, and 7:
- Select control row button 6 (playback mixing)
- Select the monome pads corresponding to channel 0, 3, 5, and 7
Lastly, if we needed to capture audio from channel 0 to the top row and from channel 1 to the row underneath:
- Select control row button 5 (capture mixing)
- On the top row, select the monome pad corresponding to channel 0
- On the row underneath, select the monome pad corresponding to channel 1
-
capturing and storing a new sound
After assigning one or more capture channels, we are now ready to capture and store our first sound. If you haven't overridden the prefix or filepath defaults, new samples will be stored in the same location as candor, but in a new directory called "sounds".
There are three steps for capturing a sound using the monome:
- Arm the desired sound.
- Begin capture on the desired sound.
- Stop capture.
The concept of "arming" has been introduced to prevent careless fingers from accidentally overwriting a hard-earned sound.
If we wanted to capture audio to sound 0 from its assigned channels, we would:
- Select control row button 3 (capture)
- Arm sound 0 by pressing its corresponding pad; the pad will blink to indicate it has been "armed" but not capturing. Armed/blinking
- To begin capturing on sound 0, press its corresponding pad and that button's light will turn solid to indicate audio is being recorded.
- To stop capture on sound 0, press its pad again and the LED will turn off to indicate recording has finished and the sound has been stored.
-
playing a stored sound
Finally, what we've all been waiting for: actually playing some audio. Of course, before we can make some noise, we must have already loaded a noise/sound. candor currently only supports wav files. Wav's must be mono and (should) share the same samplerate with your JACK server. Loading a sound can be accomplished by either:
- Providing the location of a text file containing paths to pre-existing sounds.
- Capturing a new sound.
If you'd like to provide a file containing a map of pre-existing sounds, you must create a new text file. It can be of any name, and containing on each line one soundfile's path followed by the sound number to map it to. Pass that file's location as an argument of runtime option "-f" or "--file".
For example, to map sounds across the first 8 of 48 sounds:
candorSession0.txt:
/home/linuxuser/candor/samples/whackysound.wav 0
/home/linuxuser/candor/samples/crazysound.wav 1
/home/linuxuser/candor/samples/coolsound.wav 2
/home/linuxuser/candor/samples/mellowsound.wav 3
/home/linuxuser/candor/samples/groovingsound.wav 4
/home/linuxuser/candor/samples/surfysound.wav 5
/home/linuxuser/candor/samples/krautrocksound.wav 6
/home/linuxuser/candor/samples/wintersound.wav 7
And then to load it:candor --file ~/candorSession0.txt
If we wanted to playback audio from sound 0, we would:
- Select control row button 0 (playback).
- Press the pad corresponding to sound 0. The pad will light while sound is playing.
- The pad corresponding to sound 0 will turn off to indicate it has finished playing.
-
looping a sound
When you set a sound to loop, you do two things:
- During playback: instead of stopping when the sampler reaches the end of that sound, the sound is repeated until told to stop.
- Upon the successful capture and storage of new audio to that sound, playback immediately begins for that sound.
If we wanted to set sound 0 to loop, we would:
- Select control row button 1 (loop).
- Press the pad corresponding to sound 0. The pad will light to indicate sound 0 is looping.
- To stop looping of sound 0, press the corresponding pad again, the light will go off, and the sound will not restart when it has finished.
-
capturing sound for a limited duration
candor provides a facility for predetermining how long a sound will capture for. Taking the duration from an existing sound (primary sound), the newly captured sound's duration is either the same length or a multiple of the primary sound. This will prevent your sound loops from drifting out of phase and allow them more predictable behavior.
For the rest of this section, it is assumed there is a sample already loaded in sound 0. We want to setup sound 8 for limited capturing. To limit capture time:
- Select control row button 4 (capture limit)
-
Hold control row pad 4 (capture limit) and press sound 0's corresponding pad; candor will use sound 0's duration for limiting all future sound captures.
Primary sound/blinking -
Now, set the multiple of sound 0's duration to record sound 8 with. From top to left and top to bottom, the possibilites are [0-47]. We'll set it to 21 by pressing the corresponding pad, the LEDs will fill to represent that multiple. Sound 8 can now be captured.
Primary sound/blinking - After you've finished capturing sound 8, to stop limiting duration of newly captured sounds, again hold control row pad 4(capture limit) and press sound 0's corresponding pad. Sound 0 will stop blinking and when capturing new sounds, they will not be time-constrained.
-
stopping a currently playing sound
There are two ways to stop a currently playing sound:
- Tell the target sound to stop.
- Stop all currently playing sounds.
If sound 10 was playing and we wanted to stop it, we would:
- Select control row button 0 (playback).
- Hold control row button 0 and press the pad corresponding to sound 10. Sound 10's pad will turn off to indicate playback for that sound has stopped.
If sounds 2, 5, 10, and 15 were playing and we wanted to stop all of them, we would:
- Select control row button 0 (playback).
- Press control row button 0 and all pads corresponding to "remembered sounds" will turn off to indicate all playback has stopped.
-
monitoring channel inputs
For convenience, a row of the sampler is reserved for quickly monitoring each channel input through your soundcard's channel zero and channel one outputs. For more discreet monitoring during a live situation, consider reserving two of your soundcard's outputs for headphones-only monitoring.
If we wanted to monitor a soundcard's channel input six:
- Count seven buttons from the left of the "monitors select" row.
- Press that button. The led will light and input channel six of your audio card is now being directed through output channels zero and one.
-
applying simple effects to a sound
candor has simple effects to apply to each remembered sound. These are coarse playback speed, reverse playback, simple attack/decay envelopes, and click reduction.
playback speed row,attack envelope, decay envelope
Along the "playback speed row", from left to right the speeds are ordered 25%, 50%, 75%, 100%, 125%, 150%, 175%, and 200%. To set the playback speed of a sound at 50% speed:
- Count two buttons from the left of the "playback speed row".
- Press that button. If you retrigger sounds from the sampler that are enabled for effects, or retoggle effects for a sound, that sound will inherit the current effects settings.
- To play the sound at normal speed, count four buttons from the left.
- Press that button. If you retrigger sounds from the sampler that are enabled for effects, or retoggle effects for a sound, that sound will play at normal speed.
- To play a sound in reverse, hold down the default-lit button four buttons from the left on the "playback speed row".
- With that button still held, press the leftmost button. That button will begin to blink.
- Press the default or 'held' button again. If you retrigger sounds from the sampler that are enabled for effects, or retoggle effects for a sound, that sound will play at 100% speed, but in reverse. Play around with the other speed settings!
blinking
Along the "attack envelope" and "decay envelope" rows, the lengths of the envelopes are relative to the length of the affected sound. From left to right the envelope proportions are 0%, 1%, 5%, 10%, 25%, 50%, 75%, and 99%.:
- To set the attack envelope to 10%, count four buttons from the left on the "attack envelope" row.
- Press that button. If you retrigger sounds from the sampler that are enabled for effects, or retoggle effects for a sound, that sound will inherit the current effects settings.
- To set the decay envelope to 50%, count four buttons from the left on the "attack envelope" row.
- Press that button. If you retrigger sounds from the sampler that are enabled for effects, or retoggle effects for a sound, that sound will inherit the current effects settings.
- In order to reduce clipping on the start and ending of a track, hold the left-most button on the "attack envelope" and "decay envolope" row.
- The buttons will begin to blink. If you retrigger sounds from the sampler that are enabled for effects, or retoggle effects for a sound, that sound will inherit reduced clipping. Reduced clipping may be combined with an attack or decay envolope (but not both).
blinking
7. candor sequencer
-
overview
The sequencer is candor's facility for coordinating the triggering of existing remembered sounds. It features a maximum of 48 steps, each step consisting of 6 optional voices.
The monome sequencer interface provides, instead of the 48 remembered sounds, a timeline/steps view (showing general sequencer position and allows toggling of each step's voices), a control row for thumbing thru each of the row's toggle "pages", coarse tempo/recordable tap tempo control, and toggling sequencer transport.
sequencer timeline/voice togglingtimeline viewsteps pagingcoarse tempo controlrecord taps, pause/resume sequencer
The default mode of the sequencer is the timeline view, an LED moving along the top 48 buttons representing the sequencer's current step in realtime. The next 6 buttons in the steps paging row represent each of the 48 steps; button 1 replaces the timeline view with steps 0-7, button 2 provides steps 8-15, provides 16-23 and soforth. Button 7 in this row pauses and resumes the sequencer's movement. Detailed, task-based desriptions follow in the coming minisections. Step-assignment is described in its own, full-sized section called assigning a sound to a step's voice.
-
pausing and resuming the sequencer
Pausing the sequencer interrupts its "transport" or progression from one step to another. Once you resume transport, the sequencer picks up on the last step where it left off.
If we wanted to pause the sequencer from the monome:
- Hold down the steps paging row button 0 (timeline view).
- While holding down button steps paging row button 0, press steps paging row button 7 (sequencer pause)
- Steps paging row button 7 will begin to blink.
- While holding down steps paging row button 0, again press steps paging row button 7
- Button 7 of steps paging row will light and the sequencer will now be paused.
If we wanted to resume the sequencer from the monome:
- Hold down steps paging row button 0 (timeline view).
- While Holding down steps paging row button 0, press steps paging row button 7 (sequencer pause).
- Steps paging row button 0's light will turn off and the sequencer will resume transport.
-
sequencer as a master clock or slave
Through open sound control, candor provides a facility for either slaving the sequencer to the master clock of another external device or acting as its own master clock.
The clock output is on by default. A message will be sent out at each step of the sequencer. The path of the message '/candor/clock' is accompanied by an integer representing the sequencer's current step number (0-47). Connect to the osc sending port with your favorite program and you will see messages that look like the one below:
/candor/clock 45
The clock input is activated through the monome or another osc message described in the following subsections. Connect to the osc receiving port with your favorite program and send a message simply consisting of the path '/candor/clock'. Normal transport will turn off and the sequencer will advance each time the candor receiving port accepts a message with the prementioned path. For clarity an example of the message is shown:
/candor/clock
If we wanted to pause the sequencer from the monome:
- Hold down the steps paging row button 0 (timeline view).
- While holding down button steps paging row button 0, press steps paging row button 7 (sequencer pause)
- Steps paging row button 7 will begin to blink.
- While holding down steps paging row button 0, again press steps paging row button 7
- Button 7 of steps paging row will light and the sequencer will now be paused.
If we wanted to resume the sequencer from the monome:
- Hold down steps paging row button 0 (timeline view).
- While Holding down steps paging row button 0, press steps paging row button 7 (sequencer pause).
- Steps paging row button 0's light will turn off and the sequencer will resume transport.
-
setting the sequencer to follow tap-tempo
In candor it is possible use a monome to record a tap rhythm for the sequencer to follow. This feature will temporarily disable the internally clocked bpm transport.
If we wanted to record a tempo for the sequencer to follow:
- Hold down the steps paging row button 0 (timeline view).
- While holding down button steps paging row button 0, press steps paging row button 7 (tap begin record)
- Steps paging row button 7 will begin to blink.
- Now, begin to advance the playhead by tapping steps paging row button 7.
- While holding down steps paging row button 0, again press steps paging row button 7
- Button 7 of steps paging row will light and the sequencer will repeat the timing of your taps from earlier.
If we wanted to resume non-tap-tempo sequencer operation:
- Hold down steps paging row button 0 (timeline view).
- While Holding down steps paging row button 0, press steps paging row button 7 (tap stop record).
- Steps paging row button 0's light will turn off and the sequencer will resume "normal" transport.
-
adjusting the sequencer's tempo
Aside from tap-tempo, the sequencer's speed may be adjusted using coarse or fine controls.
The sequencer's coarse tempo controls are available from a horizontal slider in increments of 15, 30, 60, 120, 240, 480, 600, and 700bpm. Ranges are selected from smallest to greatest tempo, left to right.
- To set the sequencer to run at 240bpm, count five buttons from the left of the "coarse tempo control".
- Press the button and the sequencer will now be rolling at 240bpm.
The sequencer's fine tempo controls are located on the lower left-hand quadrant of the monome, one button on the left side of the step selection row and another on the right. Each press of the control raises or lowers the currently held tempo by 1bpm.
- To lower the tempo by 1bpm, press the left fine tempo control button.
- To raise the tempo by 1bpm, press the right fine tempo control button.
raise/lower current tempo by 1bpm
-
assigning a sound to a step's voice
One of the more interesting features of candor is the ability to assign sounds recorded (or loaded) through the sampler to steps of the sequencer. This allows one to retrigger the playback of samples in a predictable manner. The sequencer consists of a total forty-eight steps, each step possessing six independent voices. That is, with every advancement of the playhead up to six unique sounds may be triggered at the same time. The bottom 128 keys of the monome are dedicated to step assignment, simple effects, and fine tempo adjustment. Effects and fine tempo adjustment will be discussed in a later section.
step/voice assignment,current sound select, step selection row, effects and fine sequencer tempo
There are three major components to assigning a sound to one of the sequencer's steps:
- Current sound select, or which sample you're currently using for step assignment. Each key's position represents the corresponding sound on the sampler.
- Step/voice assignment, each of the eight columns represents a step. Each of the six buttons in the column represents a voice for that step.
- Step selection row, provides access to each of the forty-eight steps. There are six buttons in this row, each displays a range of eight steps on the "step/voice assignment" area. If you'd like to assign steps 1-8, press the leftmost button. If you'd like to assign 40-48, press the rightmost one.
Selecting the current sound
- To assign sound one of forty-eight, look at the corresponding button on the sampler.
- Since the corresponding button is the most top-left, press the most top-left button on the 'current sound select' area.
Finding the correct step for step assignment
- To assign your sound to voice two of six, step twenty-seven, the correct "step/voice assignment" page must be selected on the "step selection row".
- The six pages of the "step selection row" represent steps 1-8, 9-16, 17-24, 25-32, 33-40, and 41-48. Page four must be selected for range 25-32.
Assigning the selected sound to a voice
- After you've selected a sound to assign and found the correct page for the desired step, the next step is to assign the voice.
- Currently on page four, in the range of 25-32, count three columns from the left for step twenty-seven's voices. Then count two buttons down for step twenty-seven, voice two.
- Press the button. Sound one has been assigned to step twenty-seven, voice two.
-
toggling a step's voice to trigger
After a step's voice has been assigned, it must be toggled to trigger before the sequencer initiates playback.
In the previous section, sound 0 was assigned to step twenty-seven, voice two. This step/voice will be toggled for triggering.
- Similar to how the correct step was found during step assignment, the step for voice toggling is found the same way.
- On the "steps paging" row of the sequencer, select page four to access the 25-32 step range.
- For step twenty-seven, count three columns from the left, then count two buttons down for voice two.
- Press that button and its led will light. When the sequencer's playhead reaches that step, sound 0 will be triggered.
8. open sound control
-
overview
The open sound control interface provided by candor expresses functions of Ficus and clock-related messages for the sequencer. While the osc interface can be used simulataneously with the monome, the monome may not update its interface for all state changes initiated by osc messages. Also keep in mind you have a maximum of forty-eight banks for sounds and eight channels in+out for related functions.
/candor/load si [path] [bank] -- loads a wav from filesystem
/candor/loop ii [bank] [state] -- sets looping state of a bank
/candor/setmixout iii [bank] [channel] [state] -- sets 1/on or 0/off state for mixing of capture/playback channels
/candor/setmixin iii [bank] [channel] [state]/candor/jackmonitor iii [channel_out] [channel_in] [state] -- makes raw JACK port connections, 1/on 0/off
/candor/playback i [bank] -- plays back a sound
/candor/playback_speed if [bank] [speed_multiplier] -- sets playback speed of a sound, positive/negative multiplier
/candor/playback_rampup if [bank] [length] -- amplitude ramp, decimal fraction of sound
/candor/playback_rampdown if [bank] [length]/candor/capture ii [bank] [seconds] -- begin capture on sound for n seconds
/candor/capturef ii [bank] [frames] -- begin capture on sound for n frames
/candor/durationf_out i [bank] -- get duration of sound in frames
/candor/durationf_in i [bank] -- get duration of captured sound in frames (may or may not be loaded in candor)
/candor/killplayback i [bank] -- stops playback of sound
/candor/killcapture i [bank] -- stops capture of sound
/candor/isplaying i [bank] -- returns whether sound is playing, 1/is and 0/isn't
/candor/iscapturing i [bank] -- returns whether sound is capturing
/candor/islooping i [bank] -- returns whether sound is looping
/candor/clock -- if clock input is turned on via monome, advance candor's sequencer by one step